Cloud IDE
Voximplant has a built-in IDE for developers to simplify and speed up the development process. The IDE is a part of the Voximplant control panel, developers can write and debug VoxEngine scenarios right in a web browser.
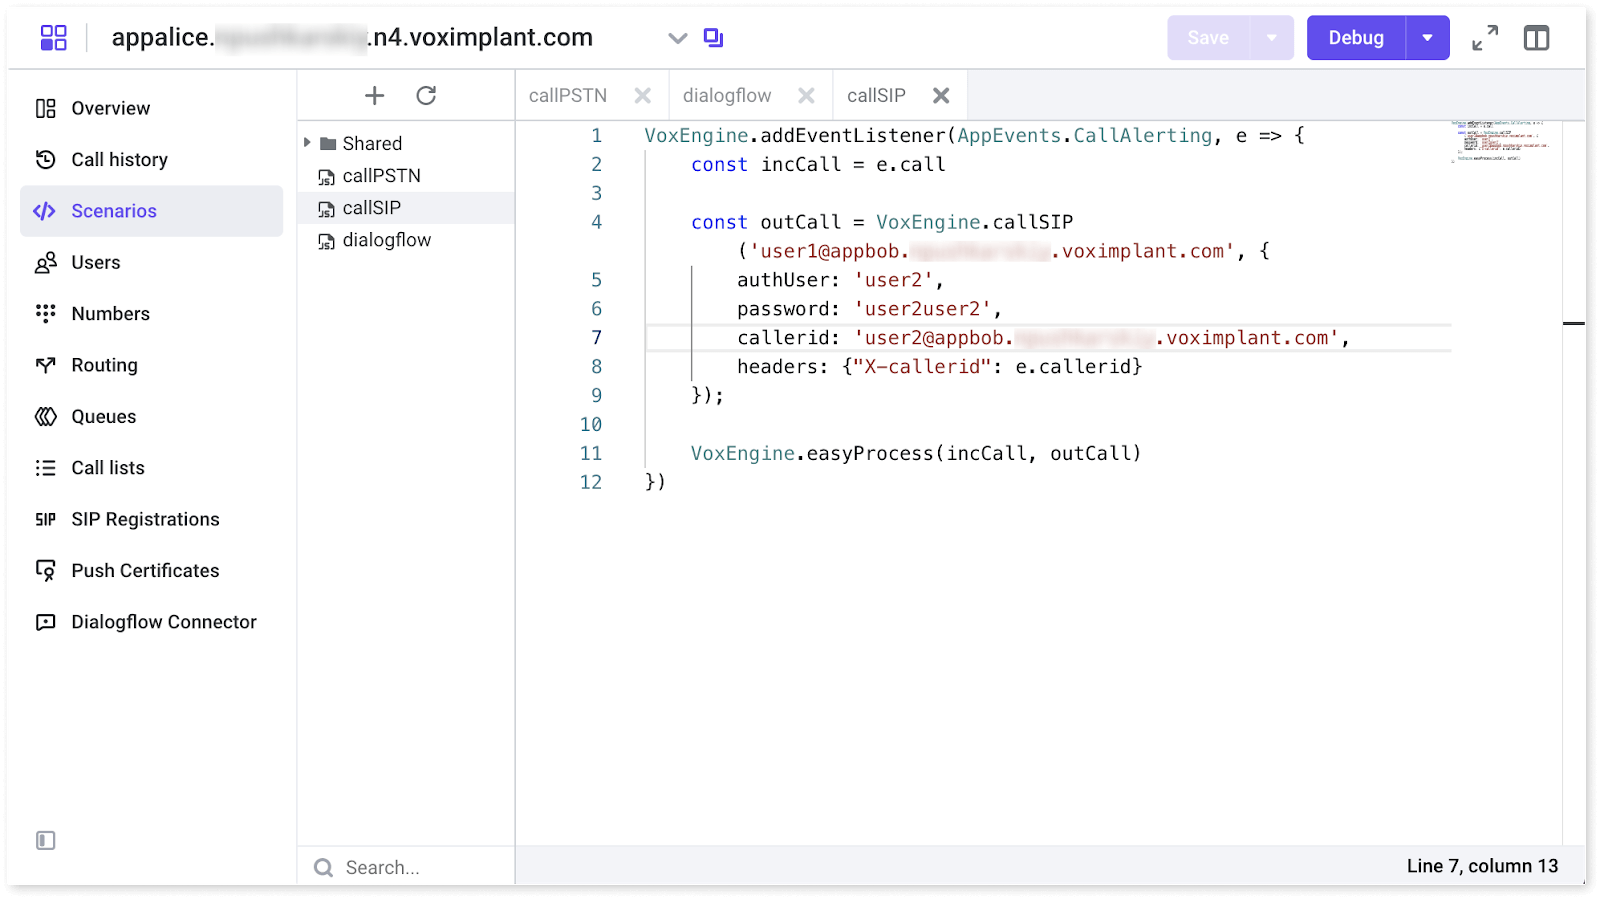
The IDE looks as follows:

Voximplant IDE includes code editing tools, such as:
- Autocomplete
- Basic syntax highlighting
- Hotkeys
- Minimap
- Tabs
- Auto-formatting
- Diff
- Folding blocks of code
- Find/go to definitions of variables/functions
- Find and replace symbols and patterns
- Advanced navigation and editing (go to the open/closing bracket, go to the next warning/problem, delete all left/right, etc.)
Use F1 to open the command palette (or right-click in IDE) and explore all available commands. There is also a debugger that enables you to set debugging parameters before the first run and adjust them as needed.
Autocomplete
IDE offers extended autocomplete support, i.e., whenever a developer types anything similar to VoxEngine entities, the editor is ready to show all the appropriate namespaces, classes, and methods. Just hit Enter or Tab to use one of the suggested variants.
IDE supports vanilla JavaScript only, but there is a TypeScript declaration file available that expands the autocomplete options. If you prefer to write code in an offline editor, you can download this declaration file and use it in the desired IDE. Bear in mind that it does not allow you to use TypeScript or any other language except for JavaScript to create Voximplant scenarios. Remember to transpile your offline code to regular JavaScript before pasting it into the Voximplant IDE.

Diff
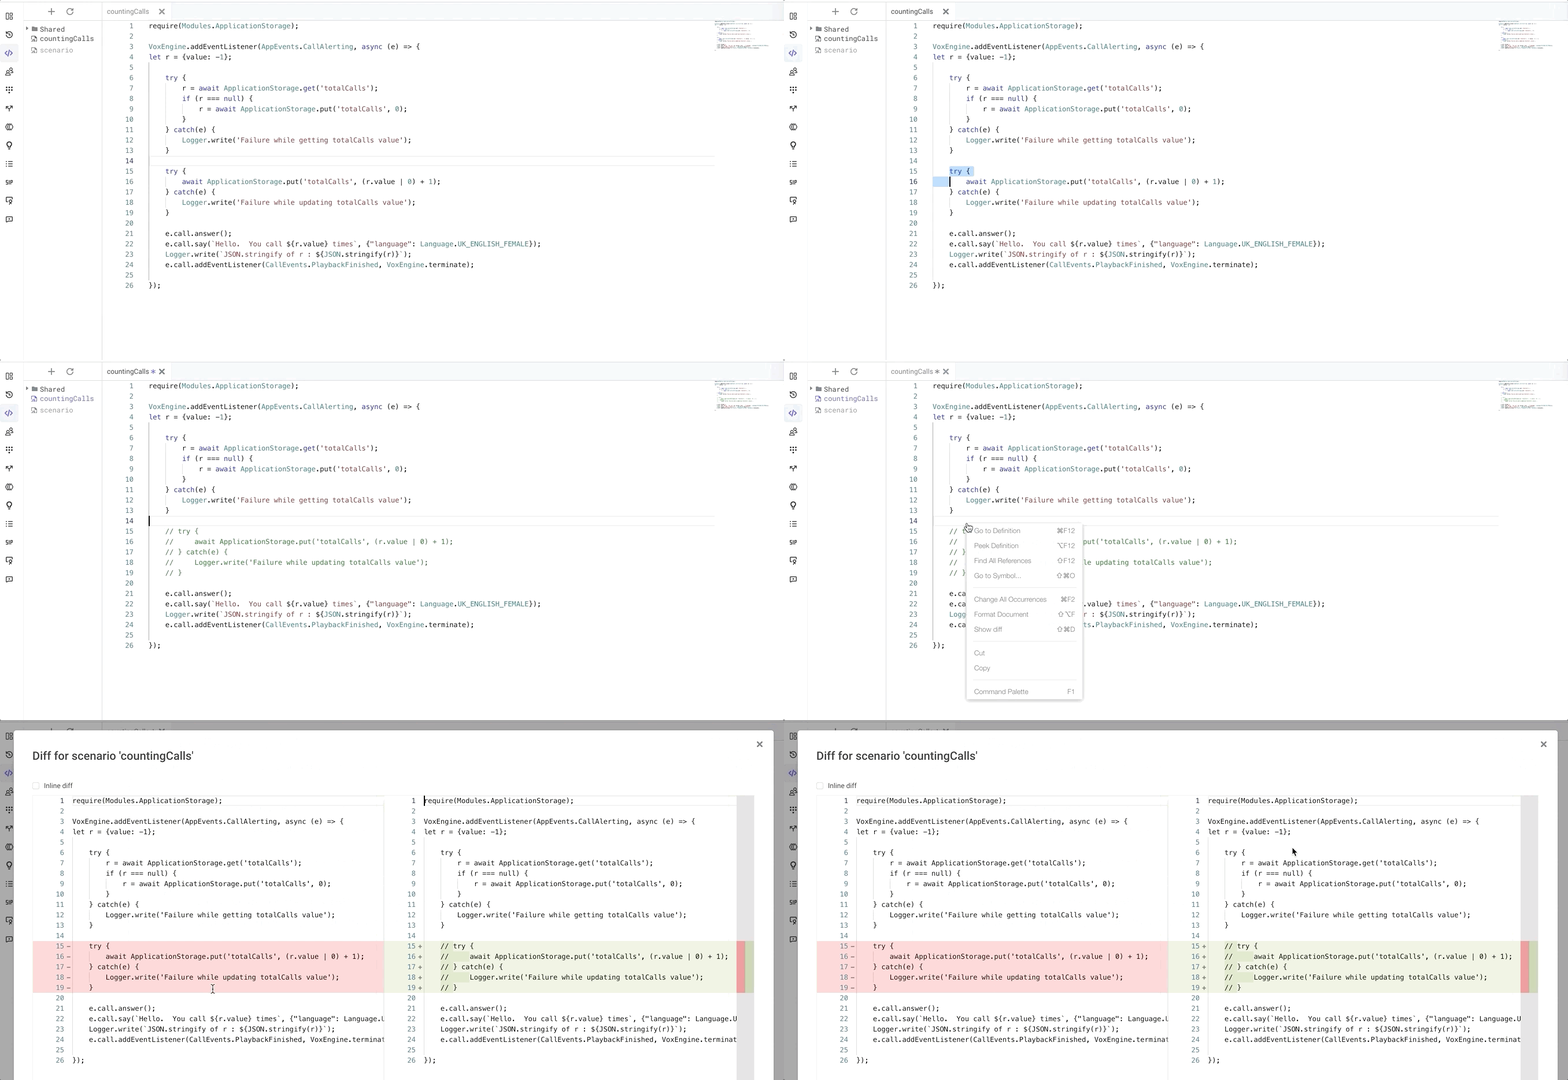
It is easy to check the changes in the scenarios before saving with the embedded Diff utility. The Diff tool shows the difference between the scenario version stored in the Voximplant's cloud and the one with the recent changes. Developers can find the Show diff command in the context menu which is opened by double-clicking in a scenario. By default, the Diff dialog shows changes in a side-by-side mode; you can switch to the inline mode by selecting the checkbox in the upper right corner.

The editor has a built-in syntax highlighter to colorize JavaScript in a way that one can distinguish blocks of code from one another. The highlighter correctly operates with the latest ECMAScript specs as well as with the previous ones. Hence, whatever specs you prefer, the code is colorized properly.
Navigation is effective too: you can jump right to the open/closing bracket or parenthesis, find all the occurrences of the selected fragment, peek at the definition for a value to see it in the overlaid new frame, etc. If your code contains more lines than your screen can fit in, you are allowed to use not only scrolling on the right side of the screen but also a minimap in the top right corner. Tabs let you freely switch between scenarios, whereas splitting screen allows the editor to display two independent parts with their own tabs.
