ACD v1 usage
ACD v1 is the previous version of SmartQueue (ACD v2). It provides functionality to build call queues and process them by connecting to multiple agents. Though we recommend using SmartQueue (ACD v2), Voximplant still fully supports ACD v1 for existing customers.
We recommend using SmartQueue instead of ACD v1.
Contents
How to build a queue with ACD v1
- Open Applications in the Voximplant control panel.
- Go to your application and switch to the Queues tab.
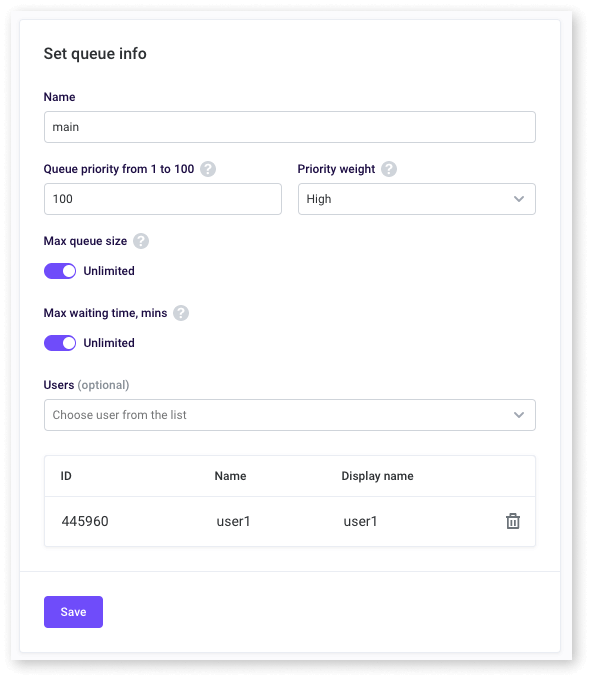
- Click Create queue in the upper right corner (or Create in the center of the screen). Name the queue, assign at least one user, and click Add to confirm the operation. Note that a queue name should be unique within your Voximplant developer account. In this example, the queue's name is "main".

Switch to the Scenarios tab and create a queue scenario with the following code:
First, we require the ACD module, then create a handler for an incoming call. Inside the handler, we answer a call and when it connects, put this call to the queue via the enqueueACDRequest method. When an agent is reached, i.e., answers a call, we connect the caller with this agent. Finally, we place the handlers for cases when an agent rejects a call and either side of the conversation hangs up.
To add some music while the customer waits in the queue, use the startPlayback method. To start background music, update the previous code as follows (lines 11 and 12):
Music automatically stops after an agent answers and a new audio source is connected to the call via sendMediaBetween.
How to manage statuses in ACD v1
There are the following statuses in ACD:
Ready. Agent is ready to answer calls, i.e., he or she is treated by ACD as available
Online. Initial status. It applies in two cases:
- Agent has just logged in at the workplace
- We want to unban an agent
In Service. Agent is talking with a customer
After Service. Agent has finished a conversation. The status can be applied to give an agent some time to fill out the forms, making notes in CRM about the customer, etc.
Offline. Agent is not logged in
Timeout. Agent has a break, e.g., went for lunch
DND (Do Not Disturb). Agent is busy with other work not related to answering calls
Banned. Agent has not answered a call, and ACD has banned them
Note that all the statuses should be set manually, except for Banned – it is set automatically. The Online status is set automatically only when an agent has logged in.
To summarize, all statuses except for Ready, Offline, and Banned work the same, so different names can be used to track statistics.
In Web SDK, status can be set via the getOperatorACDStatus method and changed via setOperatorACDStatus. However, you can retrieve an agent status from a JS scenario directly via the getStatus method.
Additionally, you can track changing statuses via the ACDStatusUpdated event. The event is triggered when the ACD agent status is changed due to the setOperatorACDStatus call (on any SDK logged in under that user) or due to a server-side event (the agent is banned because of a missed call).
If you want to use management API, use the acd_status field of the UserInfoType structure returned by the /GetUsers method call now contains an up-to-date value of the current user's ACD status as a string.
In our demo web phone, agent status can be changed via a button row:

Look at the scheme below to familiarize yourself with the status concept:

How to see reports in ACD v1
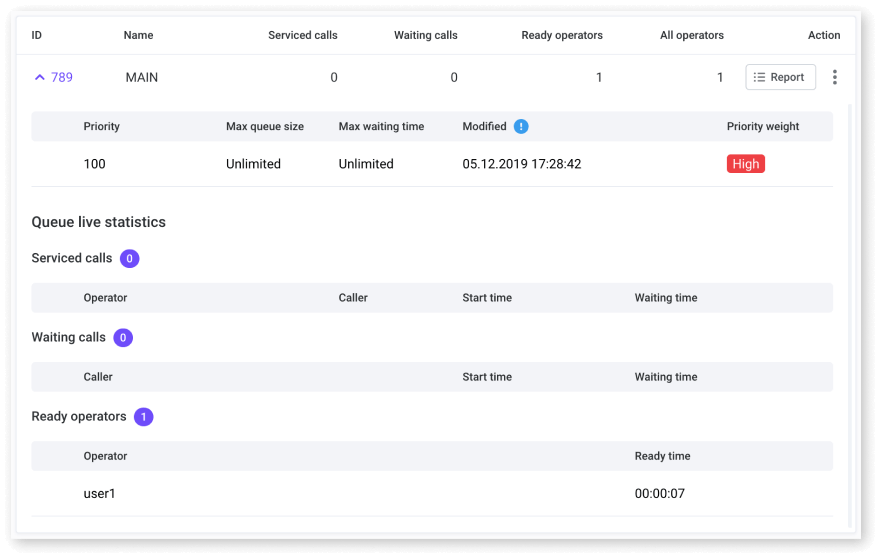
In the control panel, go to your application, and switch to the Queues tab. Here can see the list of your ACD queues with an arrow icon on the left. Click on it to expand stats for the queue:

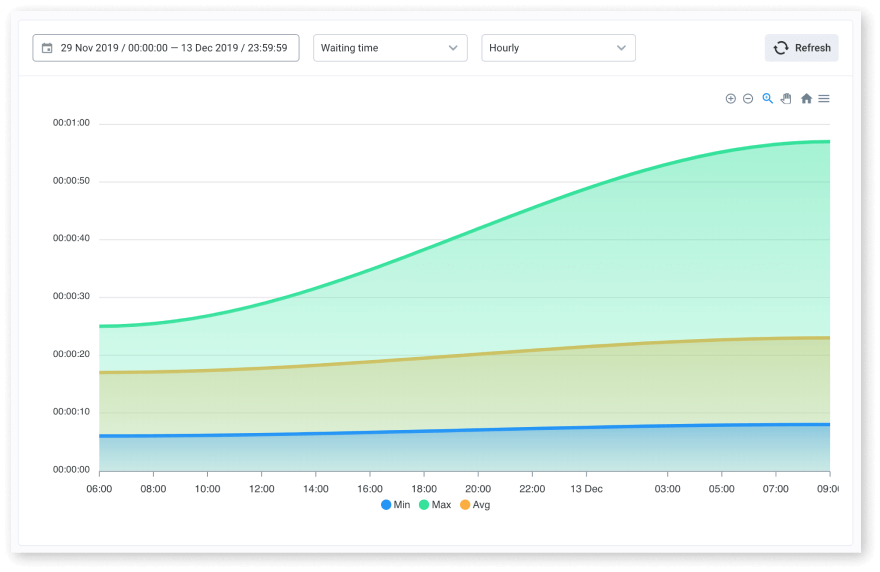
There is a Report button on the right, click it to reveal the extended stats:

You can also request stats via management API, check the Queues methods. Here is an example of how to get the current ACD queue state:
How to implement a callback queue with ACD v1
You can implement queues with callback functions for your customers. With this feature, a customer who waits in a queue can press a specific button and end the call but remain in the queue. When the customer reaches their turn, the scenario connects the customer to the agent via calling both sides.
Let us modify the code example from the first section:
This scenario processes incoming calls, but sometimes developers would like to put a call in a queue from a callback form. Let us do it via StartScenarios management API request and additional code in the scenario:
It is also possible to make requests to the session using media_session_access_url and get queue position updates to display it to the customer.
Frequently asked questions
Q: When a call arrives to the ACD v1 call center, only one agent receives it. How can I set it up so all the agents can see the call and the first agent that answers it, gets it?
A: When a call arrives, ACD v1 distributes the call to a specific agent based on the queue parameters and agents' load. If you want to distribute the calls manually between agents, you can avoid using ACD v1 and write your own scenario that distributes the calls. You can get the active agents list via Management API.
Q: I have an issue switching the queue to incoming calls, I cannot add agents to the queue. How do I solve it?
A: You can bind users to queue via the BindUserToQueue API request, or use a service account with the rights to manage an ACD v1 queue.
