VoxEngine: a cloud app
Are you looking to create a cloud-based application, such as a calling or messaging app, an IVR, or an automated survey with voice synthesis and recognition? Look no further than VoxEngine.
VoxEngine is a cloud application runtime that enables developers to run their applications directly from the cloud. To get started, all you need is a browser, JavaScript knowledge, and our comprehensive documentation.
This guide provides an overview of getting started with a cloud app. For more information about VoxEngine, its fundamental concepts, and tips, refer to the VoxEngine section in Guides.
Now, let us delve into the process of building your first application on VoxEngine. The general steps involve:
- Create an application
- Create a scenario inside it
- Create a rule and attach it to the scenario
- Buy a phone number and attach it to the application
- Test the app
Let us explore each step in more detail.
Application
Let us start with an application. Log in to your Voximplant account or create a new one on the Voximplant control panel. Then, navigate to the application section and click New application in the upper right corner or Create at the bottom of the page:
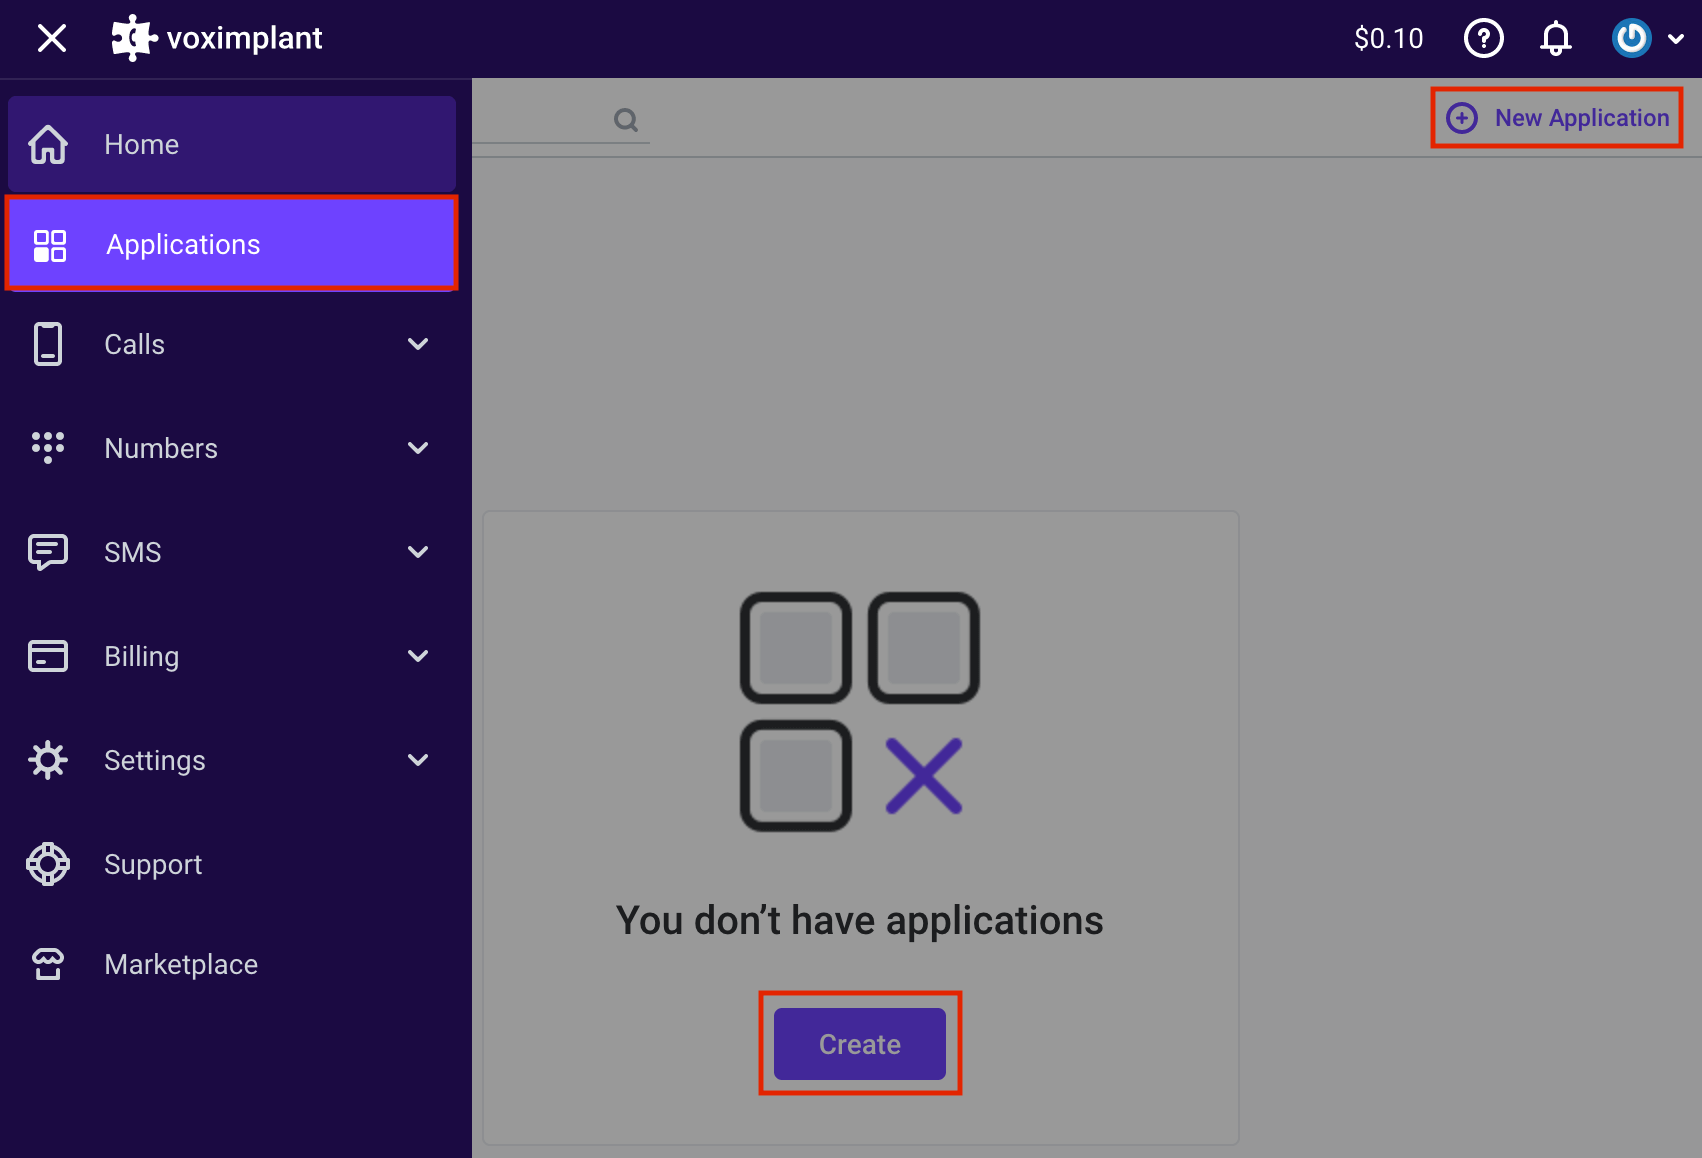
This opens the New application editor window, where you can set up your app and confirm the changes by clicking Create. The new app then appears in the application list. To modify its name, icon, or description, click the three dots menu and select Edit.

With this done, we move to scenario creation.
Scenario
Now, let us move on to scenario creation. Open your newly created app and select Scenarios from the left menu. Click on the plus icon to create a new scenario and give it a name.

This opens a new tab in the online IDE on the right, where you can write your code. You can rename the scenario or change the source code later. Additionally, you can upload changes automatically via the Management API.
Now, name your scenario and add some code. Here is an example of what you can write there:
In this scenario, we use the say method to play synthesized speech to the callee. However, we test this after creating a rule and purchasing a phone number.
Rule
Now, let us move to the Rules section. Rules specify which scenarios should be executed when a call arrives at the platform or when the StartScenarios API method is called. To create a rule, switch to the Routing tab of the application. You can either click Create in the center of the screen or New rule in the upper right corner:
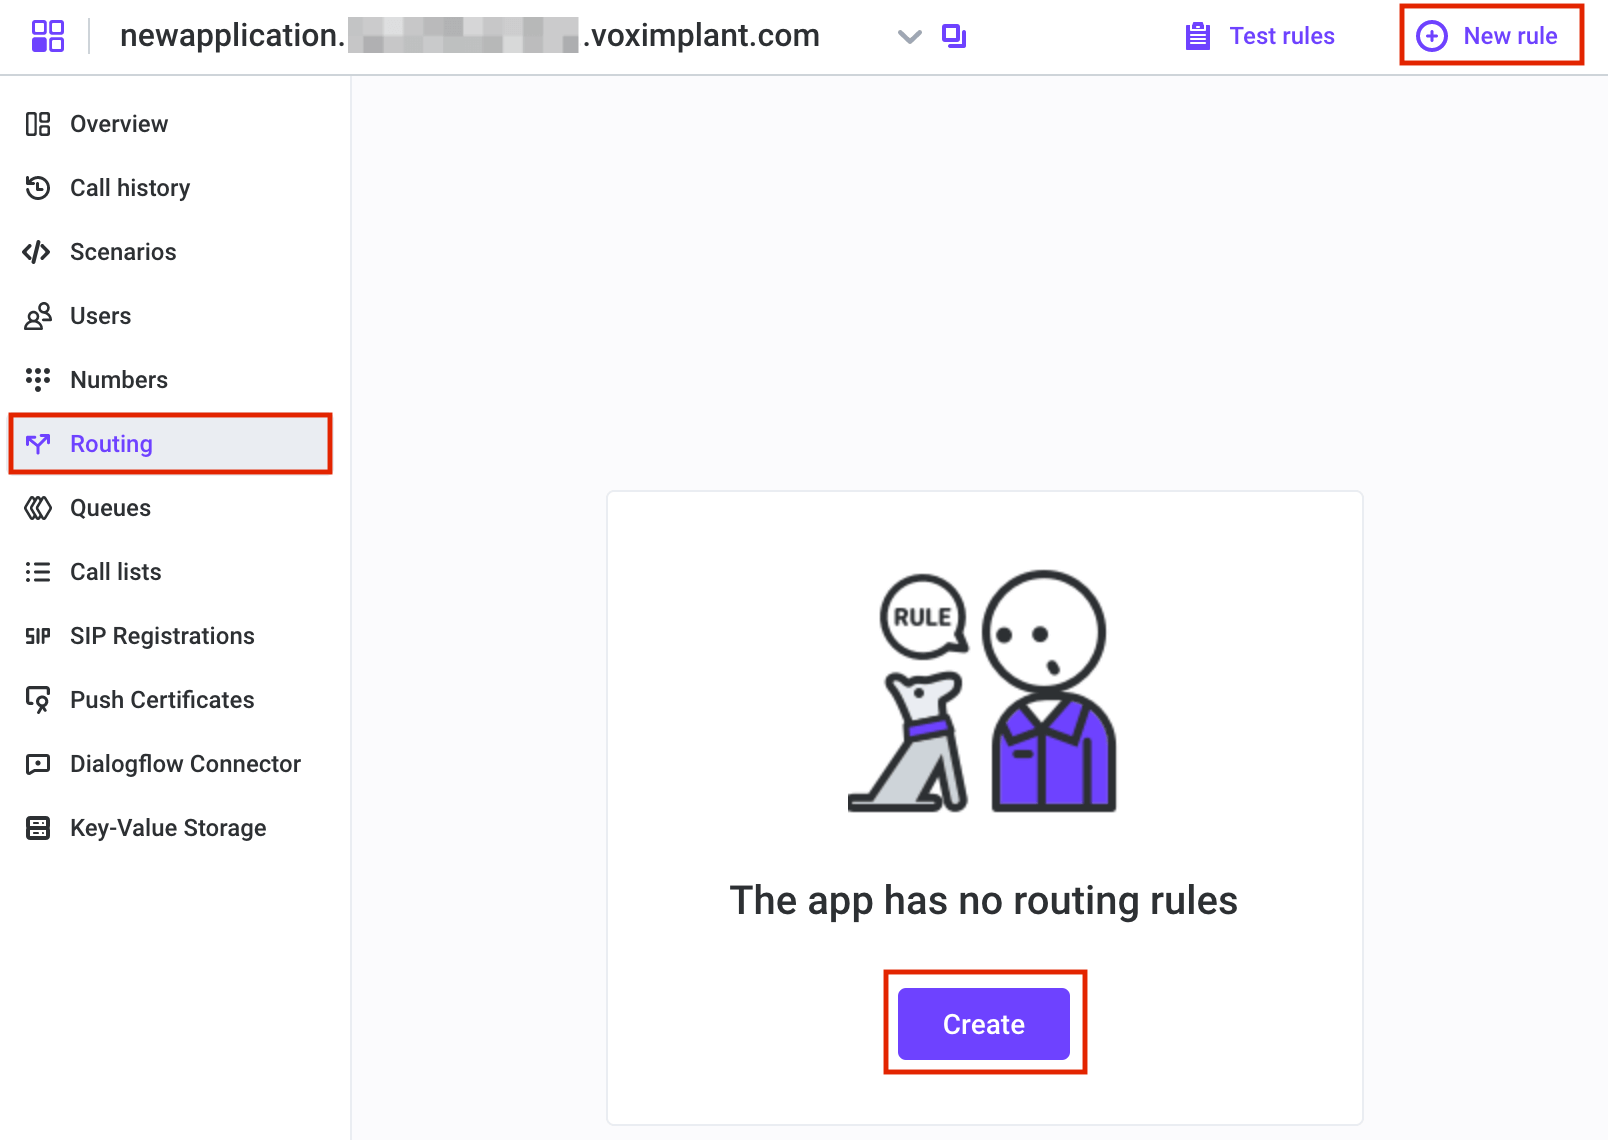
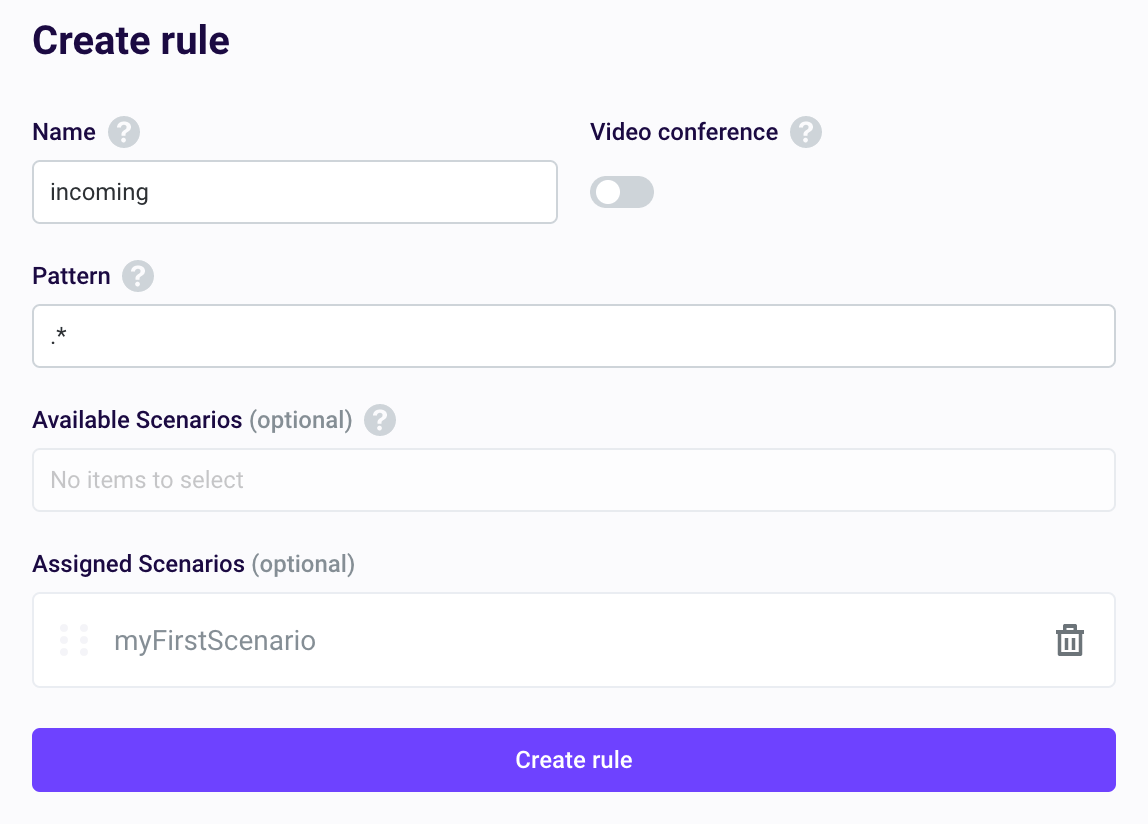
This opens an editor where you can enter a rule name and select JavaScript scenarios. For instance, name the rule ‘incoming’ and choose the ‘myFirstScenario’ scenario from the Available Scenarios list. Once you have created the rule, confirm it.
Phone number
To test your app, we need a phone number. You can rent one from us and set your own caller ID (not for test numbers). In this quickstart, we rent a test phone number accessible as an extension.
On the Voximplant control panel, select My phone numbers from the left menu and then click Buy new phone number in the upper right corner:
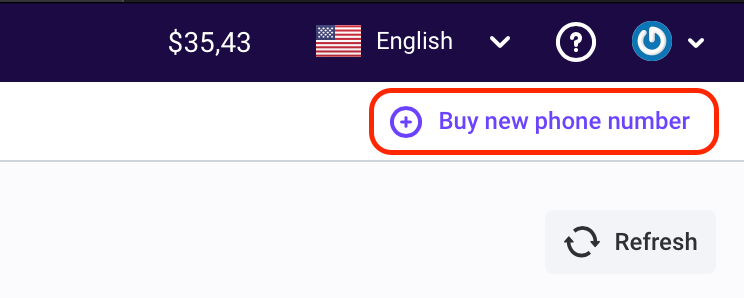
The phone number interface displays. Select Test numbers, then choose one or more test numbers and click Buy selected:
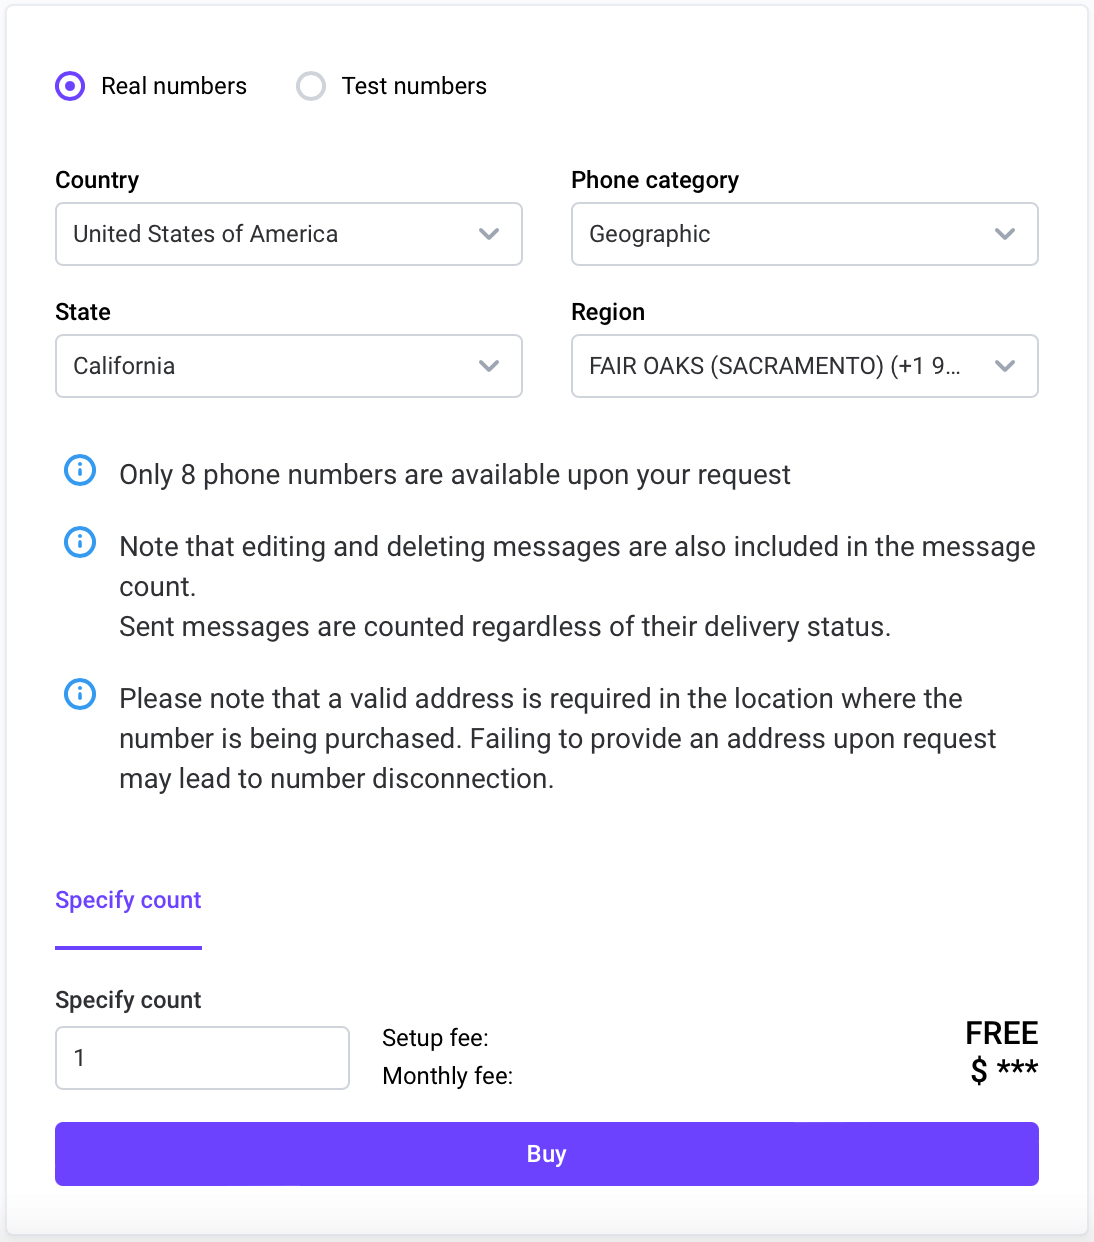
After buying a number, you can see it immediately on the list.
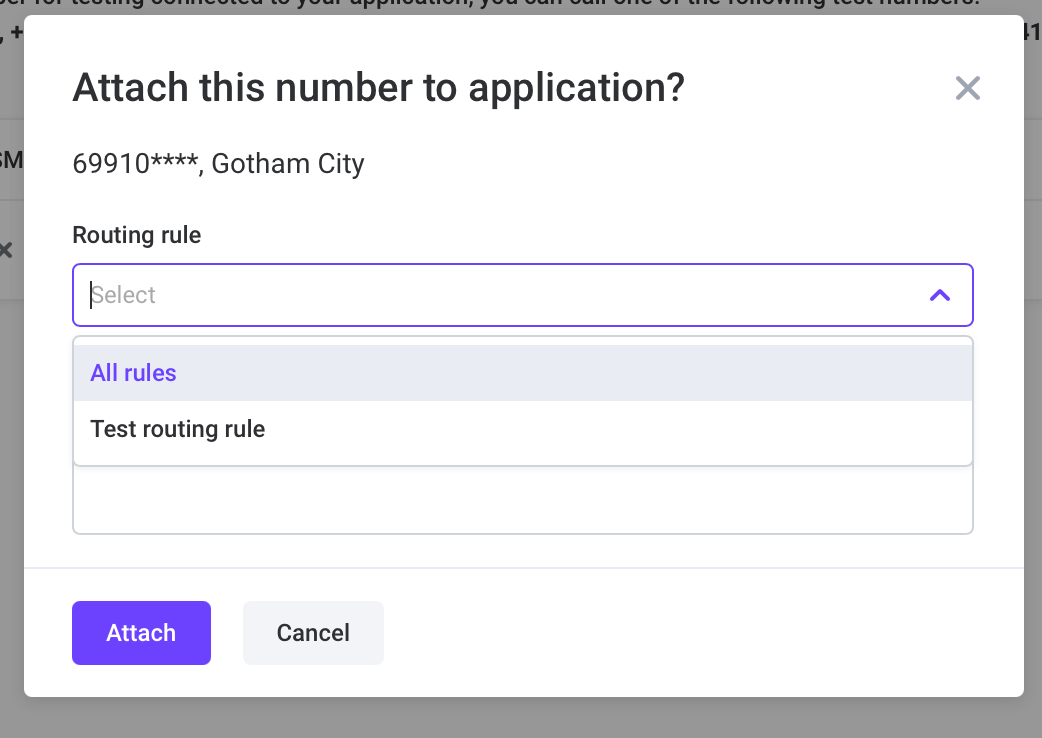
To associate a phone number with your application, execute your JavaScript code and play a voice greeting when the rented phone number is called. Go to Applications, select the necessary application, and switch to the Numbers tab. Click on the Available tab, select a number, and click Attach.
Now, you can choose a routing rule. In this case, you can use the rule you created or all rules.
Test call
Next, you can make a call. Dial one of the access numbers displayed on the page and enter the extension number you purchased when prompted.

When the connection is established, you hear a synthesized voice reading a text. This is the Voximplant cloud executing your JavaScript code and carrying out your instructions. If you encounter any errors, refer to the Voximplant JavaScript session log for detailed information.
Each application session generates a log file containing all incoming and outgoing calls. You can access this log through the control panel or the Management API. However, please note that the session log has a TTL of 1 month. After this period, you cannot access or download the session log.
I want to continue
Now that you’re familiar with creating a basic working app, you can explore our guides to enhance its functionality.
